
Uncategorized
Garage Door Sensor Cleaning
Oct
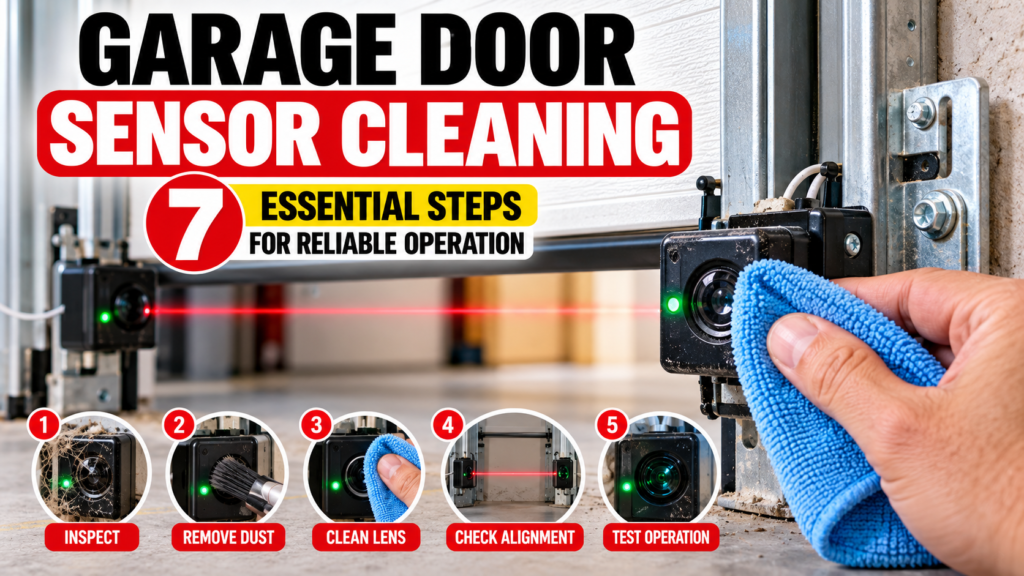
Garage Door Sensor Cleaning: 7 Essential Steps for Reliable Operation
Garage door sensors are small components, but they play an important role in the safe operation of an automatic garage door opener. When dirt, dust, cobwebs, or other debris interfere with the sensor area, the opener may behave differently from normal. Garage door sensor cleaning is therefore a simple maintenance task worth understanding before assuming that the opener itself has failed.
Proper garage door sensor cleaning starts with a careful visual inspection. The sensor lenses should be clean, the area between the sensors should remain clear, and the sensors should stay securely positioned. Cleaning alone cannot correct every sensor problem, but it can eliminate dirt and debris as a possible cause of unreliable operation.
In this guide, you will learn how to approach garage door sensor cleaning, what to inspect before and after cleaning, what common mistakes to avoid, and when a sensor problem may require further diagnosis or professional assistance.
Important: Sensor designs and diagnostic indicators can vary by garage door opener model. Use the manufacturer’s instructions for model-specific procedures and never bypass or disable a required safety system.
Table of Contents
- What Garage Door Sensors Do
- Garage Door Sensor Cleaning: 7 Essential Steps
- Inspect the Sensors Before Cleaning
- What You Need for Sensor Cleaning
- How to Clean Garage Door Sensors
- Cleaning vs. Sensor Alignment
- Signs Your Sensors May Still Have a Problem
- Common Sensor Cleaning Mistakes
- When Replacement Parts May Be Needed
- Garage Door Openers and Opener Parts
- Sensor Maintenance
- Safety Considerations
- Related Articles
- Frequently Asked Questions
- Conclusion
What Garage Door Sensors Do
Before performing garage door sensor cleaning, it helps to understand why these components matter. Many automatic garage door opener systems use photoelectric safety sensors positioned near the lower portion of the garage door tracks.
The sensors work together to monitor the space across the door opening. When something interrupts the sensor system’s detection path, the opener may prevent the door from closing or may reverse its movement depending on the system and operating conditions.
Because the sensors are installed close to the floor, they can be exposed to dust, dirt, insects, cobwebs, moisture, and accidental contact. This makes regular visual inspection and careful garage door sensor cleaning useful maintenance practices.
Cleaning should not be viewed as a universal repair. A sensor that remains problematic after cleaning may have an alignment issue, wiring problem, physical damage, or another condition that requires additional diagnosis.
Garage Door Sensor Cleaning: 7 Essential Steps
A simple garage door sensor cleaning routine can be divided into seven basic steps. These steps are intended as general maintenance guidance rather than a replacement for the instructions supplied with a particular opener.
- Identify both safety sensors.
- Visually inspect the sensor lenses.
- Remove loose dust and cobwebs carefully.
- Gently wipe the sensor lenses with a clean, soft material.
- Inspect the area between the sensors.
- Check that the sensors remain securely positioned.
- Test the opener according to the manufacturer’s instructions.
These steps keep garage door sensor cleaning focused on removing surface contamination without turning a simple maintenance task into an unnecessary adjustment or disassembly procedure.
Inspect the Sensors Before Cleaning
Start by looking at both sensors before touching them. This gives you a reference point and can reveal a problem that cleaning will not solve.
Look for Dirt and Dust
Dust can collect around the sensor housing and lens. Cobwebs can also form around the brackets and interfere with the area around the sensor.
If the lens visibly contains dirt or debris, garage door sensor cleaning may be an appropriate first maintenance step.
Look for Physical Damage
Check for cracked housings, loose brackets, damaged wires, or signs that a sensor has been struck. Do not attempt to repair damaged electrical components with an improvised solution.
Check Both Sides
It is important to inspect both sensors. Cleaning only the sensor that looks dirty may not address the actual condition if the other sensor is contaminated, displaced, or damaged.
What You Need for Sensor Cleaning
One advantage of garage door sensor cleaning is that it generally does not require a complicated collection of tools. The goal is to remove surface contamination without damaging the sensor.
A basic cleaning setup may include:
- A clean, soft cloth.
- A suitable dry microfiber cloth.
- A small amount of appropriate cleaning material if the manufacturer’s instructions permit it.
- A flashlight for inspecting dark areas around the sensors.
Avoid using abrasive materials that could scratch a sensor lens. Also avoid spraying an unknown cleaning chemical directly into an electrical component.
Keep it simple: The objective of sensor cleaning is to remove surface dirt without introducing moisture, chemicals, or physical damage that could create another problem.
How to Clean Garage Door Sensors
The actual garage door sensor cleaning process should be gentle. Start with loose debris and then move to the sensor lens itself.
Step 1: Remove Loose Debris
Carefully remove visible cobwebs, dust, and loose debris from around the sensor housing. Do not pull on the wiring or sensor bracket.
Step 2: Wipe the Lens
Use a clean, soft cloth to gently wipe the visible lens area. Avoid aggressive rubbing because the objective is simply to remove surface contamination.
Step 3: Clean Both Sensors
Repeat the process on the second sensor. Consistent garage door sensor cleaning should address both sides of the safety-sensor system.
Step 4: Inspect the Sensor Path
Look across the space between the sensors. Make sure stored objects, tools, boxes, decorations, or other items are not positioned where they could interfere with the sensor system.
Step 5: Inspect After Cleaning
Once cleaning is complete, visually inspect both sensors again. Make sure nothing has been accidentally moved during the cleaning process.
Cleaning vs. Sensor Alignment
One of the most important distinctions in garage door sensor cleaning is understanding that clean sensors are not necessarily correctly aligned.
The sensors need to maintain the correct relationship with one another for the safety system to function properly. A sensor can have a perfectly clean lens and still fail to operate normally if its position has changed.
For this reason, do not automatically adjust a sensor simply because the opener is experiencing a closing problem. First determine whether dirt is present, whether the sensor appears physically displaced, and what diagnostic information the opener provides.
If alignment is required, use the instructions for the exact opener model. Avoid applying a generic adjustment procedure to an unfamiliar system.
Cleaning is not alignment: If the lenses are clean but the opener still reports a sensor-related problem, additional diagnosis may be necessary.
Signs Your Sensors May Still Have a Problem
After garage door sensor cleaning, observe how the opener behaves. A continuing problem may indicate that the cause is something other than surface dirt.
Possible warning signs include:
- The garage door refuses to close normally.
- The opener reverses unexpectedly.
- A sensor indicator does not behave as expected for the specific model.
- The problem returns shortly after cleaning.
- A sensor appears loose or physically displaced.
- Visible wiring damage is present.
- The opener reports a sensor-related diagnostic condition.
These symptoms do not prove that a sensor has failed. They indicate that further investigation may be appropriate.
For broader diagnosis, see our related guide on LiftMaster Garage Door Opener Troubleshooting.
Common Sensor Cleaning Mistakes
Although garage door sensor cleaning is relatively straightforward, several mistakes can create unnecessary problems.
Using Abrasive Materials
Rough materials can scratch surfaces and should be avoided when cleaning a sensor lens.
Spraying Liquid Directly Onto the Sensor
Electrical components should not be exposed unnecessarily to liquids. If a cleaning product is appropriate for a particular model, follow the manufacturer’s instructions.
Moving the Sensor While Cleaning
Applying excessive pressure can move a sensor or bracket. Clean gently and inspect the sensor position afterward.
Cleaning Only One Sensor
The system uses two sensors working together. Cleaning only one side can leave the other sensor contaminated.
Assuming Cleaning Fixes Every Problem
Cleaning removes dirt, but it cannot automatically correct damaged wiring, physical damage, alignment problems, or a failed component.
When Replacement Parts May Be Needed
If garage door sensor cleaning does not resolve the issue and the sensor system shows signs of damage or failure, a compatible replacement component may be necessary.
Replacement decisions should be based on the exact opener model and the component required. Do not order a sensor simply because it looks similar to the existing part.
Check the manufacturer’s part information and verify compatibility before ordering.
If the cause of the problem has not been identified, replacing parts at random can result in unnecessary expense and may not correct the underlying issue.
Garage Door Openers and Opener Parts
Garage door sensor maintenance is only one part of maintaining an automatic opener system. If you are replacing an opener or searching for compatible components, use the appropriate product category.
Garage Door Openers
Browse the available Garage Door Openers at Garage Door Operator Direct when researching complete opener systems.
Review the available product information and verify that the selected opener is appropriate for the intended application before ordering.
Garage Door Opener Parts
For replacement components, browse Garage Door Opener Parts.
Always verify the exact opener model and part compatibility before ordering a replacement component.
Sensor Maintenance
Regular inspection can make garage door sensor cleaning easier because dirt and cobwebs can be addressed before they accumulate.
During routine garage-door observation, look at the sensor area for dust, insects, cobwebs, accidental impacts, or changes in sensor position.
Keep storage items away from the sensor path. Avoid leaning tools, boxes, or other objects against sensor brackets or wiring.
Pay attention to changes in opener behavior. If the garage door begins acting differently after operating normally for an extended period, investigate the symptoms rather than repeatedly cycling the opener.
A simple maintenance habit of visually checking the sensors can help you identify contamination before it becomes a more noticeable issue.
Safety Considerations
Garage door safety sensors are part of the opener’s safety system. Garage door sensor cleaning should therefore be performed carefully and should never involve bypassing or disabling safety features.
- Do not bypass the safety sensors.
- Do not intentionally disable a safety feature to make the opener operate.
- Keep children and other people away from the moving door during testing.
- Do not work on energized electrical wiring unless you are qualified.
- Do not attempt spring or cable repairs as part of sensor maintenance.
- Follow the manufacturer’s instructions for model-specific testing.
If the sensors appear physically damaged, wiring is damaged, or the opener continues to report a safety-related fault after basic inspection and cleaning, professional assistance may be appropriate.
The U.S. Consumer Product Safety Commission provides information concerning automatic residential garage door operators and applicable safety requirements in its Automatic Residential Garage Door Operators guidance.
For manufacturer-specific information, consult the official LiftMaster repair and maintenance resources.
Related Articles
Continue through the garage door sensor and opener troubleshooting cluster with these related articles:
- LiftMaster Garage Door Opener Troubleshooting
- LiftMaster Garage Door Opener Not Working
- Garage Door Sensor Not Working
- Garage Door Sensor Wiring Diagram
These related articles are designed to connect the sensor-maintenance topic with broader opener troubleshooting and sensor diagnosis as the cluster continues to be published.
Frequently Asked Questions
1. How often should I perform garage door sensor cleaning?
There is no universal cleaning interval for every garage door system. Inspect the sensors periodically and clean them whenever visible dust, cobwebs, or debris accumulates. Environmental conditions can determine how frequently cleaning is needed.
2. What should I use for garage door sensor cleaning?
A clean, soft cloth is generally appropriate for removing surface dust from the sensor area. Follow the opener manufacturer’s instructions before using any cleaning liquid or chemical.
3. Can dirty sensors stop a garage door from closing?
Dirt or debris can interfere with the sensor system, but a closing problem can have several possible causes. Inspect the sensors, the space between them, and the opener’s diagnostic information before assuming dirt is the only problem.
4. Should I clean both garage door sensors?
Yes. Both sensors should be inspected and cleaned when contamination is present because they operate as a pair within the safety system.
5. Can cleaning fix misaligned garage door sensors?
Cleaning and alignment are different issues. Cleaning can remove contamination, but it does not necessarily correct a sensor that has been physically moved. If alignment is suspected, follow the instructions for the exact opener model.
6. What if my garage door still will not close after cleaning the sensors?
Check for obstructions, inspect the sensor position and indicators, and consult the opener’s model-specific diagnostic information. If the problem remains unresolved, professional diagnosis may be appropriate.
7. Can I bypass the sensors temporarily?
No. Safety sensors should not be bypassed or disabled. If the system is reporting a safety-related problem, identify and correct the cause using the manufacturer’s instructions or obtain professional service.
8. When should garage door sensors be replaced?
Replacement may be necessary when a sensor is confirmed to be damaged or defective and cleaning, inspection, and appropriate troubleshooting do not resolve the problem. Always verify the replacement part’s compatibility with the exact opener model.
Conclusion
Garage door sensor cleaning is a simple maintenance task that can help keep the sensor area free from dust, cobwebs, and other surface debris. The process should be gentle and should include both sensors rather than focusing on only one side.
Remember that cleaning is only one part of diagnosis. If the opener continues to experience a sensor-related problem after cleaning, investigate alignment, obstructions, wiring, physical damage, and model-specific diagnostic information.
Never bypass a safety sensor simply to make the garage door operate. When a problem involves electrical wiring, damaged hardware, or another condition that cannot be safely diagnosed, professional assistance is the appropriate next step.
For complete opener systems, browse Garage Door Openers. For replacement components, browse Garage Door Opener Parts.
