
Uncategorized
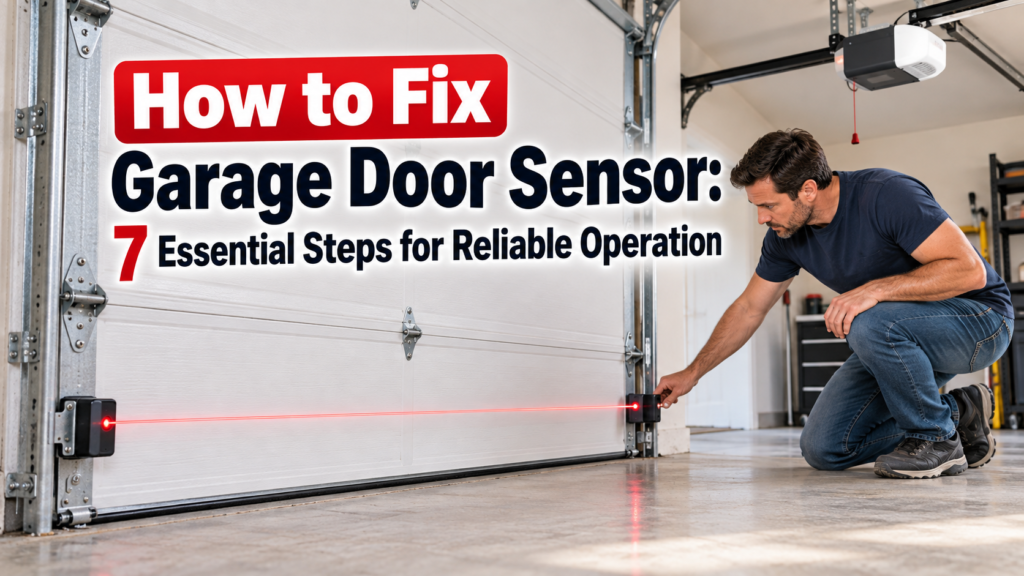
How to Fix Garage Door Sensor
Oct
How to Fix Garage Door Sensor Problems: 7 Safe Troubleshooting Steps
Learning how to fix garage door sensor problems can help you identify why a garage door opener refuses to close, reverses unexpectedly, or displays unusual indicator-light behavior. Garage door safety sensors are an important part of the opener’s safety system, so a sensor problem should be treated as a safety issue rather than simply an inconvenience.
In many situations, the cause is relatively simple. A sensor may be blocked by an object, covered with dirt, knocked out of alignment, or affected by a visible wiring problem. However, similar symptoms can also come from the opener itself, the door, or another component.
This guide explains how to fix garage door sensor problems using basic visual and non-invasive troubleshooting steps. You will learn what the sensors do, how to recognize common symptoms, how to check alignment and cleanliness, what to look for around the wiring, and when professional assistance may be appropriate.
Understanding how to fix garage door sensor problems safely starts with simple checks before moving toward more complicated diagnosis. The goal is to identify the likely cause without bypassing an important safety system.
Important: Never bypass or defeat garage door safety sensors to make an opener operate. If the safety system is not working correctly, the underlying problem should be identified and corrected before relying on normal automatic operation.
Table of Contents
- What Garage Door Sensors Do
- Common Signs of a Sensor Problem
- How to Fix Garage Door Sensor Problems Safely
- Check Sensor Alignment
- Clean the Sensor Lenses
- Remove Obstructions
- Inspect Visible Wiring
- Check the Sensor Brackets
- Consider Strong Light Interference
- When Sensor Replacement May Be Needed
- Garage Door Sensor Diagnosis Table
- Common Troubleshooting Mistakes
- Replacement Parts and Compatibility
- Garage Door Sensor Maintenance
- Garage Door Sensor Safety
- Related Garage Door Troubleshooting Articles
- Frequently Asked Questions
- Conclusion
What Garage Door Sensors Do
Garage door safety sensors are designed to help detect an obstruction in the path of a closing garage door. A typical photoelectric system uses two sensor units positioned near the lower portion of the garage door opening.
One sensor sends an invisible light beam while the other receives it. When the beam is interrupted or the sensors cannot communicate correctly, the opener may prevent the door from closing or reverse its movement.
The exact diagnostic behavior varies between manufacturers and opener models. Some systems use indicator lights, flashing opener lights, or diagnostic codes to help identify a possible sensor problem.
Because of these differences, the safest approach to how to fix garage door sensor problems is to identify the symptom first and then compare it with the manufacturer’s instructions for the exact opener model.
Knowing how to fix garage door sensor problems also means understanding that the sensor is part of a larger garage door opener system. A sensor symptom does not automatically mean that the sensor itself has failed.
Common Signs of a Garage Door Sensor Problem
A sensor problem can produce several recognizable symptoms. One of the most common is a garage door that opens normally but refuses to close when operated with the automatic opener.
Another common symptom is a door that begins closing and then reverses. Depending on the opener, you may also see flashing lights or unusual indicator-light behavior.
When learning how to fix garage door sensor problems, it is useful to record exactly what happens when you attempt to close the door. The specific behavior can help narrow down the possible cause.
Possible signs include:
- The garage door will not close with the opener.
- The door starts closing and then reverses.
- The opener lights flash when you attempt to close the door.
- One sensor indicator light does not show its normal pattern.
- The sensor lenses appear dirty.
- A sensor bracket appears loose or out of position.
- Visible sensor wiring appears damaged or disconnected.
These symptoms do not automatically prove that the sensor itself has failed. Obstructions, alignment problems, wiring problems, opener faults, and other conditions can create similar symptoms.
How to Fix Garage Door Sensor Problems Safely
The safest troubleshooting approach is to begin with simple visual checks. If you are learning how to fix garage door sensor problems, avoid immediately replacing components or opening electrical enclosures when the problem may have a straightforward external cause.
A practical sequence is to check for obstructions, inspect the sensor lenses, observe alignment, examine accessible wiring, and then compare the symptoms with the manufacturer’s instructions.
1. Check Sensor Alignment
Misalignment is one of the first things to check when determining how to fix garage door sensor problems. The two sensors must face one another across the garage door opening so the photoelectric signal can travel between them.
Stand back and visually inspect both sensors. They should be positioned across from each other at an appropriate height and should not appear tilted away from the opposite sensor.
If one sensor has been bumped or its mounting bracket has shifted, the beam may no longer be received correctly.
Use only the adjustment procedure specified by the manufacturer for your opener model. Do not force a bracket or modify mounting hardware simply to make the indicator light change.
A careful alignment check is an important part of how to fix garage door sensor problems because even a small change in sensor position can affect the beam between the two units.
2. Clean the Sensor Lenses
Dirty lenses can interfere with reliable sensor operation. Dust, dirt, cobwebs, and other buildup may cover part of the sensor surface.
Cleaning is one of the simplest steps in how to fix garage door sensor problems. Use a clean, soft cloth to gently wipe the visible sensor lenses.
Avoid spraying liquids or cleaning chemicals directly into the sensor housing. After cleaning, observe the indicator lights again and compare their behavior with the manufacturer’s instructions.
If cleaning changes the sensor behavior, continue observing the system to determine whether the problem has actually been resolved rather than assuming that a temporary improvement means the component is defective.
3. Remove Anything Blocking the Sensor Path
Inspect the area between the two sensors. Even a relatively small object positioned in the beam’s path can prevent the opener from closing the garage door.
Look for:
- Storage boxes near the door.
- Tools leaning against the wall.
- Objects crossing the sensor path.
- Debris near the lower part of the garage opening.
- Objects hanging from the garage door.
- Cobwebs or accumulated debris around the sensor area.
Remove any obvious obstruction without moving the sensors unnecessarily. Then check the indicator lights again.
Removing an obstruction is one of the easiest things to try when learning how to fix garage door sensor problems because it does not require changing the opener’s wiring or internal components.
4. Inspect Visible Sensor Wiring
Wiring is another important part of how to fix garage door sensor problems. A sensor can appear properly aligned while still failing if its accessible wiring is disconnected, damaged, pinched, or otherwise compromised.
Visually follow the accessible wire from the sensor toward the opener. Look for obvious damage or a connection that has become loose.
Do not assume that every wiring problem can safely be repaired by joining wires together. The correct wiring arrangement depends on the opener model and manufacturer instructions.
If you are unsure how to fix garage door sensor wiring safely, stop at the visual inspection stage rather than guessing at electrical connections.
Electrical caution: If troubleshooting requires opening electrical enclosures, testing energized circuits, modifying internal wiring, or performing work beyond your experience, stop and seek qualified professional assistance.
5. Check the Sensor Brackets
A sensor can become misaligned when its mounting bracket is bumped, loosened, bent, or moved.
Inspect both brackets visually. Look for one sensor that appears noticeably different in position from the other.
If a bracket is loose, follow the manufacturer’s instructions for securing it. Do not drill new mounting holes or modify the bracket unless the applicable instructions specifically permit it.
When considering how to fix garage door sensor problems caused by mounting hardware, the objective is to restore the manufacturer’s intended position rather than forcing the sensors into an improvised location.
6. Consider Strong Light Interference
Strong sunlight can interfere with some photoelectric sensor installations depending on the sensor design and installation conditions.
If the problem occurs mainly at a particular time of day, observe whether direct sunlight is shining toward one of the sensors.
Do not cover or disable a sensor to solve the problem. Consult the manufacturer’s documentation for an approved solution if environmental light appears to be involved.
This is another reason that how to fix garage door sensor problems should be approached as a diagnosis rather than an immediate parts-replacement exercise.
7. Determine Whether Replacement May Be Necessary
If cleaning, alignment, obstruction checks, and basic visible inspections do not resolve the problem, the sensor or another component may require further diagnosis.
However, replacing the sensor immediately is not always the correct solution. A wiring issue, opener fault, damaged bracket, or mechanical garage door problem can create similar symptoms.
Before ordering a replacement component, identify the exact opener manufacturer and model and compare the proposed replacement with the manufacturer’s compatibility information.
If you have completed the basic checks and still cannot determine how to fix garage door sensor problems, model-specific documentation or professional diagnosis may be the appropriate next step.
Garage Door Sensor Diagnosis Table
| Symptom | Possible Cause | Basic Check |
|---|---|---|
| Garage door will not close | Blocked or misaligned sensors | Inspect the sensor path, positioning, and indicator lights. |
| One sensor light behaves differently | Alignment, wiring, power, or sensor problem | Compare both sensors and inspect accessible wiring. |
| Opener lights flash when closing | Safety sensor or another diagnostic condition | Check the exact opener’s diagnostic instructions. |
| Problem occurs during bright sunlight | Possible environmental light interference | Observe when the problem occurs and consult manufacturer guidance. |
| Problem remains after basic checks | Possible wiring, sensor, opener, or door-system fault | Use model-specific troubleshooting or qualified professional service. |
Common Troubleshooting Mistakes
When searching for information about how to fix garage door sensor problems, it is easy to encounter advice that focuses only on getting the door to close.
That approach can create a safety problem if it involves defeating or bypassing the safety system.
Avoid these common mistakes:
- Do not bypass the safety sensors.
- Do not permanently disconnect a required safety device.
- Do not guess at electrical wiring connections.
- Do not replace components without checking the exact opener model.
- Do not assume every sensor symptom means the sensor itself has failed.
- Do not ignore unusual garage door movement or binding.
- Do not attempt dangerous spring or cable work unless properly qualified.
The safest answer to how to fix garage door sensor problems is not always a replacement part. Sometimes the correct solution is simply cleaning, realignment, removing an obstruction, or obtaining model-specific assistance.
Replacement Parts and Compatibility
If basic troubleshooting does not resolve the problem, a replacement sensor or another component may eventually be necessary.
Replacement should be based on the exact opener model and reliable manufacturer parts information rather than appearance alone.
Before ordering a replacement component:
- Record the opener manufacturer.
- Record the exact opener model number.
- Check the existing sensor or component part number when available.
- Compare the replacement with manufacturer compatibility information.
- Verify compatibility with your exact opener model before ordering.
For broader troubleshooting information, return to the main Garage Door Opener Troubleshooting pillar.
Garage Door Sensor Maintenance
Once you understand how to fix garage door sensor problems, regular observation can help identify potential issues before they become persistent failures.
Keep the sensor area reasonably clean and avoid storing objects where they can strike the sensor brackets.
When moving equipment or cleaning the garage, take care not to hit or reposition the sensors.
Pay attention to changes in indicator-light behavior. If the sensors begin behaving differently from their normal condition, investigate the change rather than waiting for the opener to stop operating correctly.
Understanding how to fix garage door sensor issues also makes routine maintenance easier because you know which basic conditions to inspect when sensor behavior changes.
The garage door itself should also be observed. A door that binds, becomes unusually heavy, or behaves differently may have a mechanical problem that is unrelated to the safety sensors.
Garage Door Sensor Safety
Garage doors are heavy moving systems. The door, opener, springs, cables, tracks, electrical components, and safety devices work together.
A sensor problem should therefore never be treated as a reason to defeat the safety system.
Do not bypass sensors, disconnect required safety devices, or modify safety controls simply because the garage door will not close.
If the garage door is damaged, the springs or cables appear broken, the door becomes unusually heavy, the opener behaves abnormally, or electrical work is required beyond basic visual inspection, stop troubleshooting and seek qualified professional assistance.
Safe troubleshooting of how to fix garage door sensor problems means knowing the difference between basic inspection and work that requires specialized training or equipment.
For authoritative safety information concerning automatic residential garage door operators, consult the U.S. Consumer Product Safety Commission.
Related Garage Door Troubleshooting Articles
If you are troubleshooting a garage door sensor, another part of the opener system may also be involved. The following related guides are part of this troubleshooting content cluster and will provide more detailed information as each article is developed.
These related resources can also help you continue researching how to fix garage door sensor problems when the basic sensor checks do not identify the cause.
- LiftMaster Garage Door Opener Not Working
- LiftMaster Garage Door Opener Troubleshooting
- Garage Door Sensor Cleaning
- Garage Door Sensor Not Working
- Garage Door Sensor Wiring Diagram
- Linear Garage Door Opener Troubleshooting
- Chamberlain LiftMaster Garage Door Opener Troubleshooting
For the main troubleshooting hub covering the wider topic, visit Garage Door Opener Troubleshooting.
Frequently Asked Questions
1. How do I know if my garage door sensor is the problem?
Common signs include a garage door that will not close, a door that reverses, abnormal sensor indicator lights, or flashing opener lights during an attempted closing cycle. These symptoms can have other causes, so compare them with the troubleshooting information for your exact opener model.
2. How do I fix garage door sensor alignment?
Check that both sensors are positioned across from one another and that their indicator lights show the normal pattern described in the manufacturer’s instructions. If a bracket has moved, follow the manufacturer’s approved adjustment procedure.
3. Can dirty sensors stop a garage door from closing?
Yes. Dirt, dust, cobwebs, or other buildup on the sensor lenses can interfere with reliable operation. Gently clean the visible lenses with a soft cloth and then check the sensor indicators again.
4. Why does my garage door open but not close?
A safety sensor problem is one possible cause. Other possibilities include an obstruction, wiring issue, opener fault, or another condition identified by the opener’s diagnostic system.
5. Should both garage door sensor lights be on?
Sensor light behavior varies by manufacturer and model. Many systems provide a recognizable indicator pattern when properly powered and aligned. Always compare the lights with the instructions for your exact opener.
6. Can sunlight affect garage door sensors?
Strong direct sunlight can interfere with some photoelectric sensor installations. If the problem occurs at a particular time of day, note the lighting conditions and consult the manufacturer’s instructions for an approved solution.
7. Should I replace the garage door sensor if cleaning does not work?
Not necessarily. The problem may involve alignment, wiring, the mounting bracket, the opener, or another part of the door system. Verify the cause and exact replacement part before ordering.
8. Is it safe to bypass a garage door sensor?
No. Bypassing a required safety sensor defeats part of the opener’s safety system. The underlying problem should be corrected instead.
Conclusion
Understanding how to fix garage door sensor problems starts with safe, basic diagnosis. Check the indicator lights, inspect the sensor path, clean the lenses, verify alignment, look for visible wiring problems, examine the brackets, and consider environmental conditions such as strong sunlight.
Learning how to fix garage door sensor problems does not mean bypassing the safety system or immediately replacing components. A methodical inspection can help distinguish a simple obstruction or alignment issue from a problem that requires additional diagnosis.
If those checks do not resolve the problem, do not assume that bypassing the sensors or replacing random components is the answer. The underlying issue may involve the sensor wiring, opener electronics, garage door mechanics, or another component requiring model-specific diagnosis.
Always verify compatibility before ordering replacement components, follow the manufacturer’s instructions, and seek qualified professional assistance when the repair involves dangerous mechanical or electrical work.
For the wider troubleshooting topic, continue to the main Garage Door Opener Troubleshooting pillar.
